
System Administration Instructions
Instructions
Integration of the website’s calendar
Exceeded Quota
Changing the default PDF Viewer
Stapling with the photo copier UTAX
Sending scans via email with UTAX
Sending scans via USB with UTAX
Please also notice our FAQ
Integration of the website’s calendar
This link leads to an introduction in German on how to import the events from the website’s calendar. By integrating the calendar, you can add the events to your own personal calendar in Thunderbird with lightening. This introduction is provided by Nicolas Neuß.
Exceeded Quota
In general, the home directory quota is limited to 3 GB (the command ‘du -sh ~‘ will display your current home directory size). Therefore, please avoid using Dropbox-sync, as you may easily exceed your quota almost immediately without noticing.
If you happen to exceed the home directory quota (which often will result in not being able to login): Login via console (Ctrl+Alt+F1, US keyboard layout), look for unnecessary and big files and delete them. Ideal places to look for are for example Downloads, the complete directory .mozilla/firefox/*.default/Cache/ and .thunderbird/*.default/ .
A complete list of data will be displayed when using the command ls, e.g. ls Downloads .
Remove single data using the command rm, e.g. rm Downloads/enormously_huge_data.pdf .
To remove whole directories, use the command rm -r, e.g. rm -r .mozilla/firefox/*.default/Cache/ .
When you have finished shrinking your home directory size to 3 GB (use du -sh ~ to check), logout with the command exit and return to the usual interface by pressing Ctrl+Alt+F7.
Change your default PDF-Viewer
| If you want to change your default PDF-Viewer right click on your PDF and click at “Properties” in the appearing menu. | 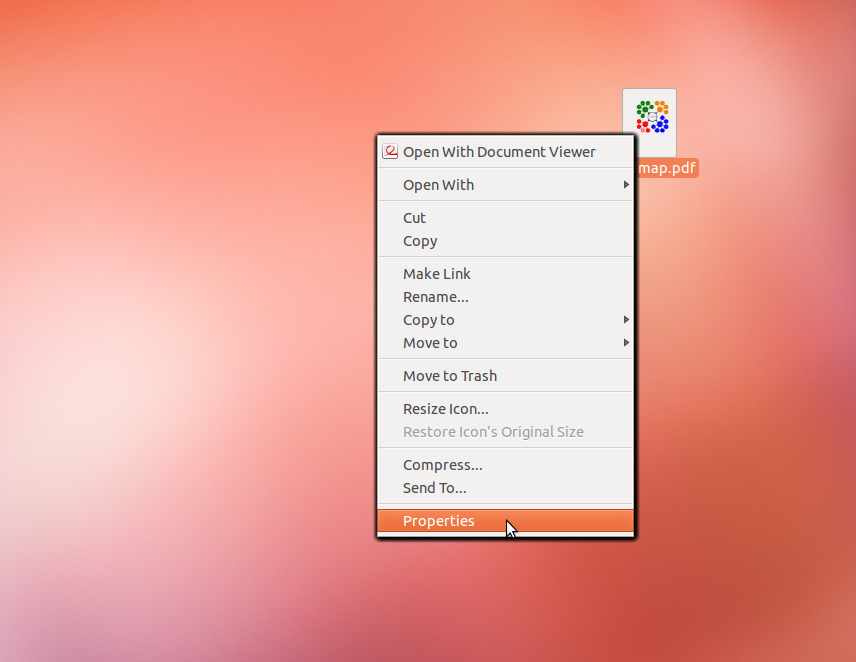 |
| A window appears. Click at the slider “Open With” and choose your favourite PDF Viewer (we recommend Okular because it produces the least problems when used for printing. Acroread should be avoided because it causes lots of errors.)… | 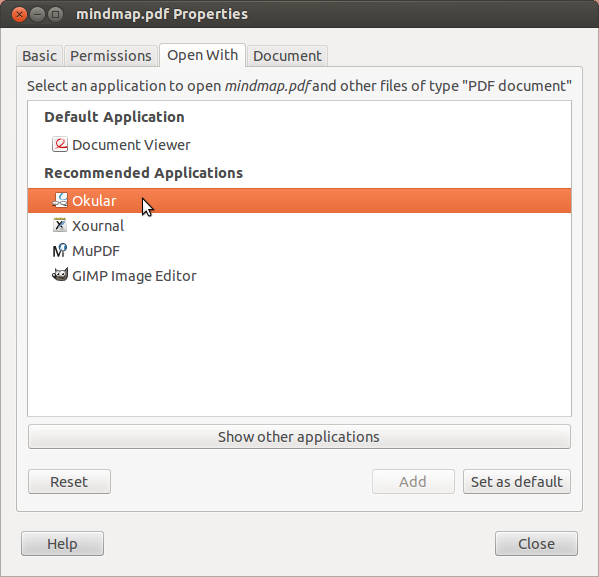 |
| …
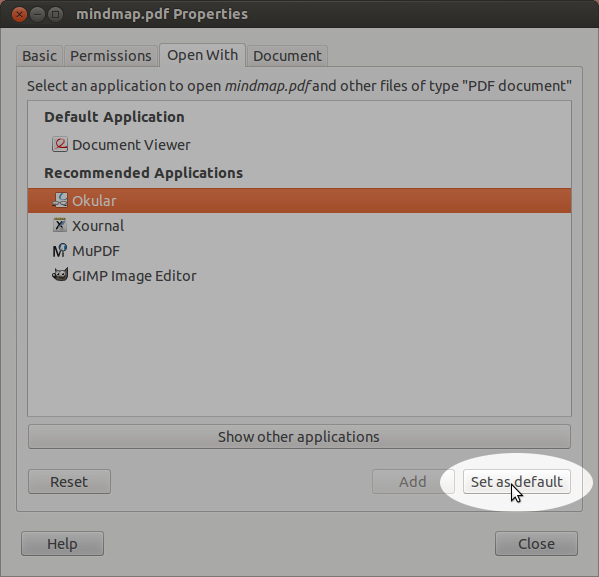
and click on “Set as Default”. From now on PDFs are opened with the selected programm when double-clicked. Of course every other standard programm can be changed like that. |
 |
Stapling with the photo copier UTAX
| LibreOffice
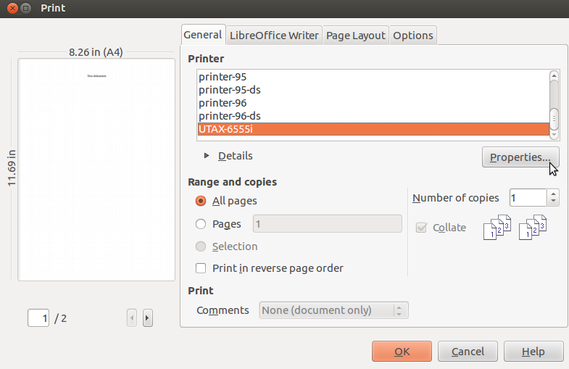
If you want to staple a document using the copier UTAX you switch to the Print menu choose UTAX-6555i and click on “Properties” |
 |
| A Window appears. You click on the tab “Device” and scroll in the left window to “Heftfunktion”. After clicking on that you can choose where to staple. | 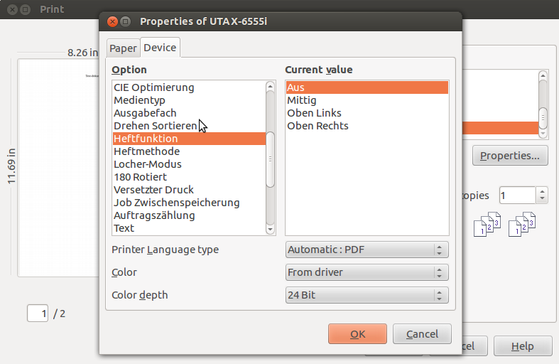 |
| “Heftmethode” also allows you to choose how many pages are stapled together. |  |
| OkularPDF
It works quite similar here. First choose the UTAX copier in the Print menu and then click on “Properties”. Click at the tab “Advanced” in the appearing Window and after scrolling down you have once again the possibility to choose “Heftfunktion” respectively “Heftmethode”. |
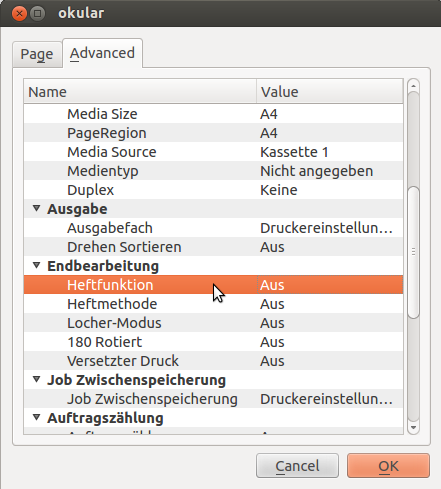 |
|
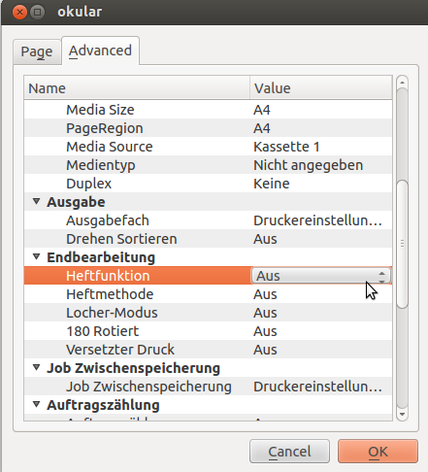
To change the current setting just double click on the field you want to change and select your choice in the appearing Dropdown menu. |
 |
| To make sure the sheets will be stapled correctly, check if “Ein” is chosen at “180 Rotiert”. | 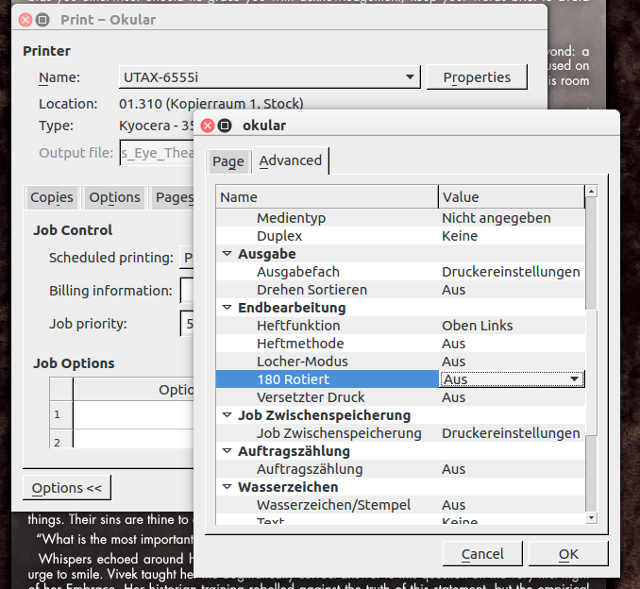 |
Sending scans via email with UTAX
| To send a scan via e-mail, choose “Startseite” (1.),
Then choose “Senden”(2.). |
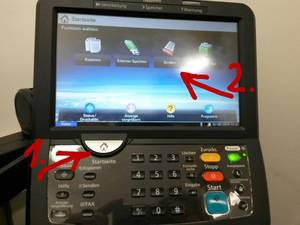 |
| In order to enter an email address choose “E-Mail Adresseing.” (3.). Click “Original/Sendedatenformat” (5.) to choose the file format. | 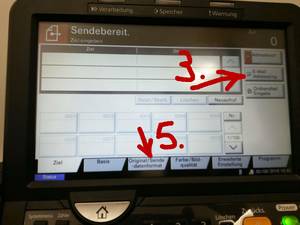 |
| After typing in your destination address, confirm with OK (4.). You’ll get to the previous menu where you can make further changes/add more e-mail addresses. | 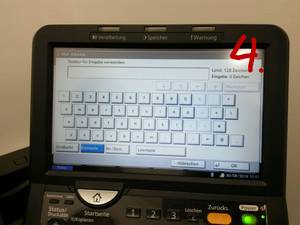 |
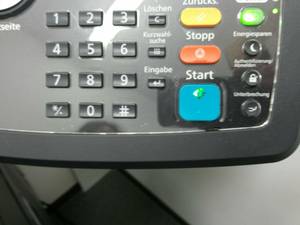
| Insert your document and confirm the process by pressing “Start”. |  |
Save scan via USB
| In order to save a scan to your personal USB storage insert the device into Slot A1. | 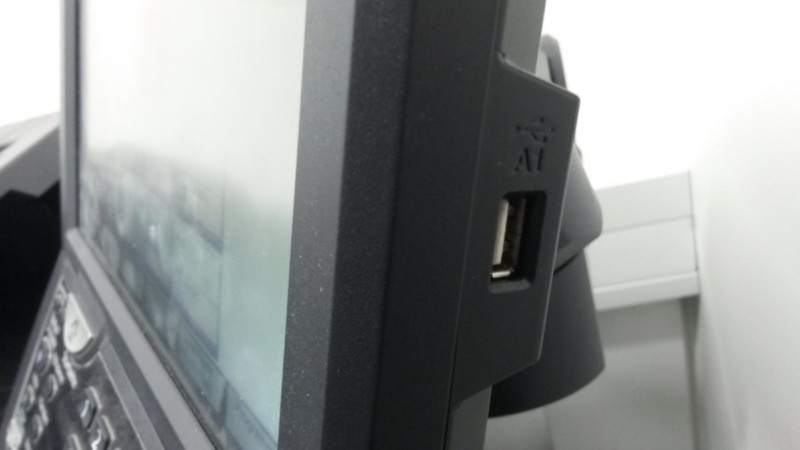 |
| On Success shown picture will appear. This can take several secods. To proceed press “↵ Ja”. | 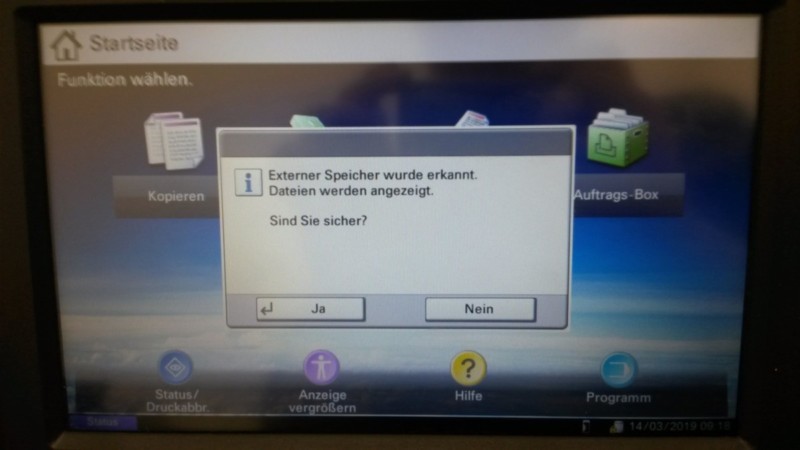 |
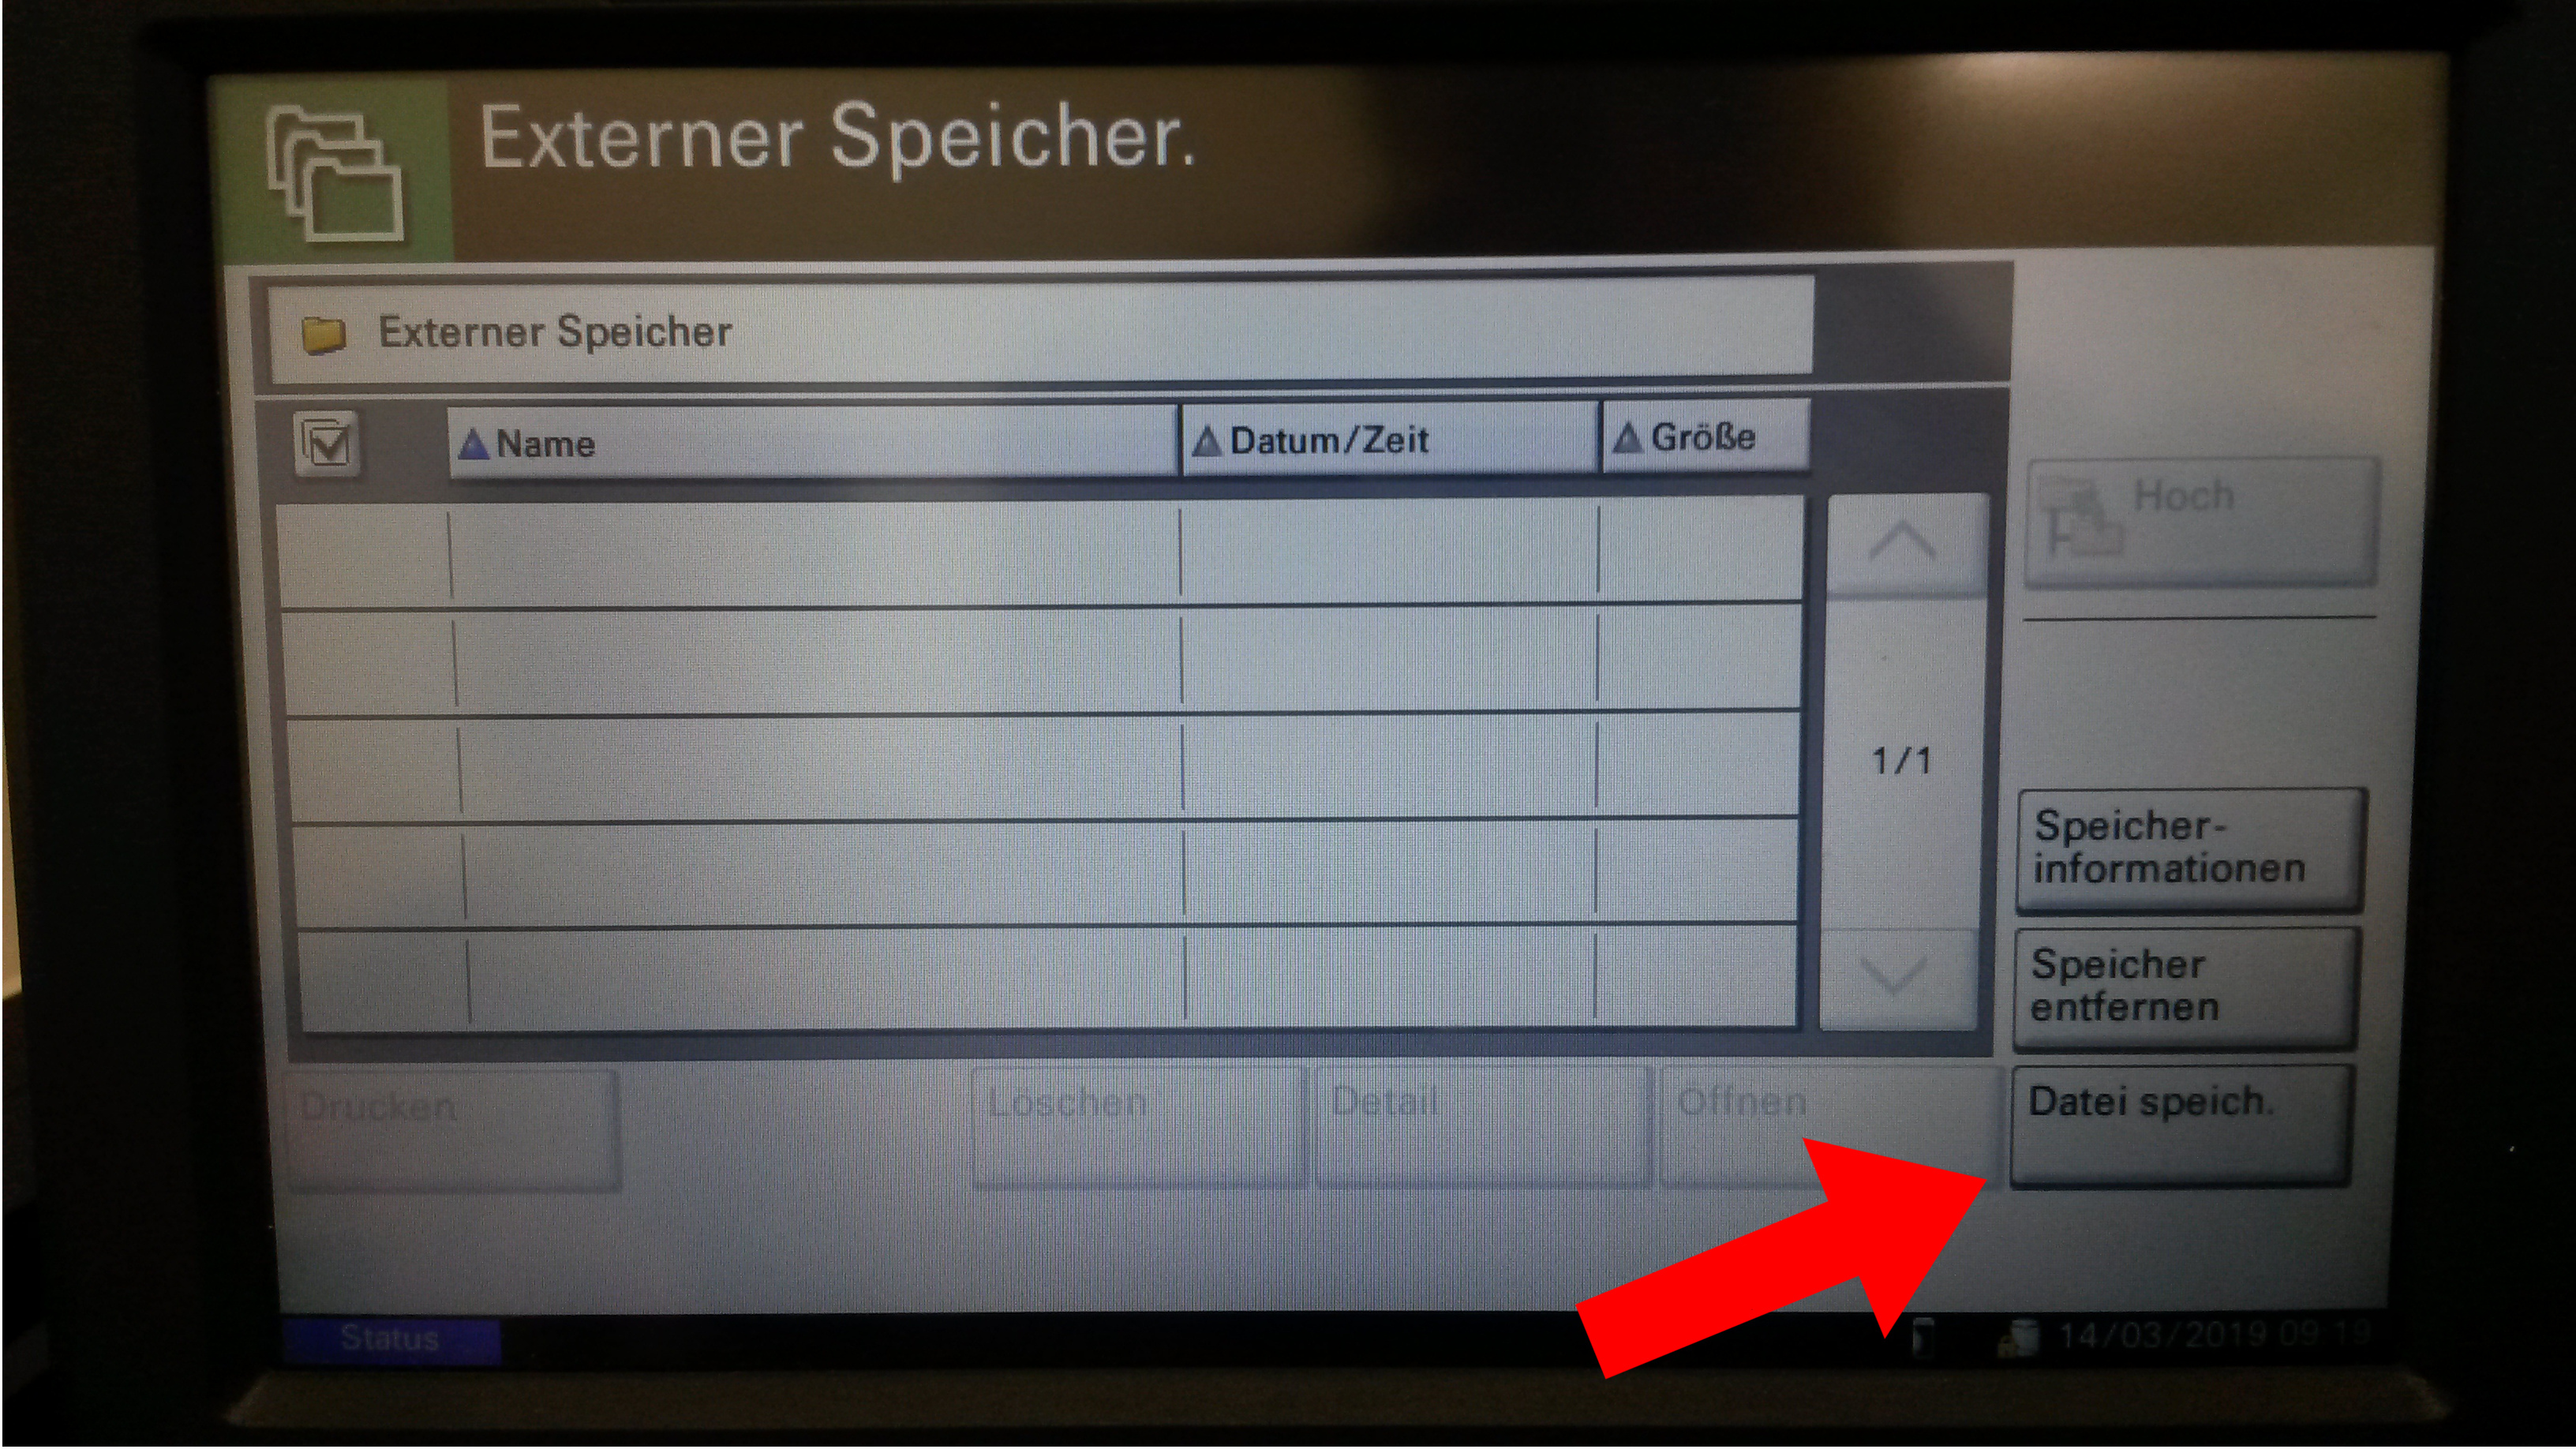
| Press “Datei speichern” to proceed. |
 |
| Now you can configure several options. To do so press any of these six options or press “Funktionen” to get more options. |  |
| Here you can configure advanced options. Please play attention to more options on the second page. | 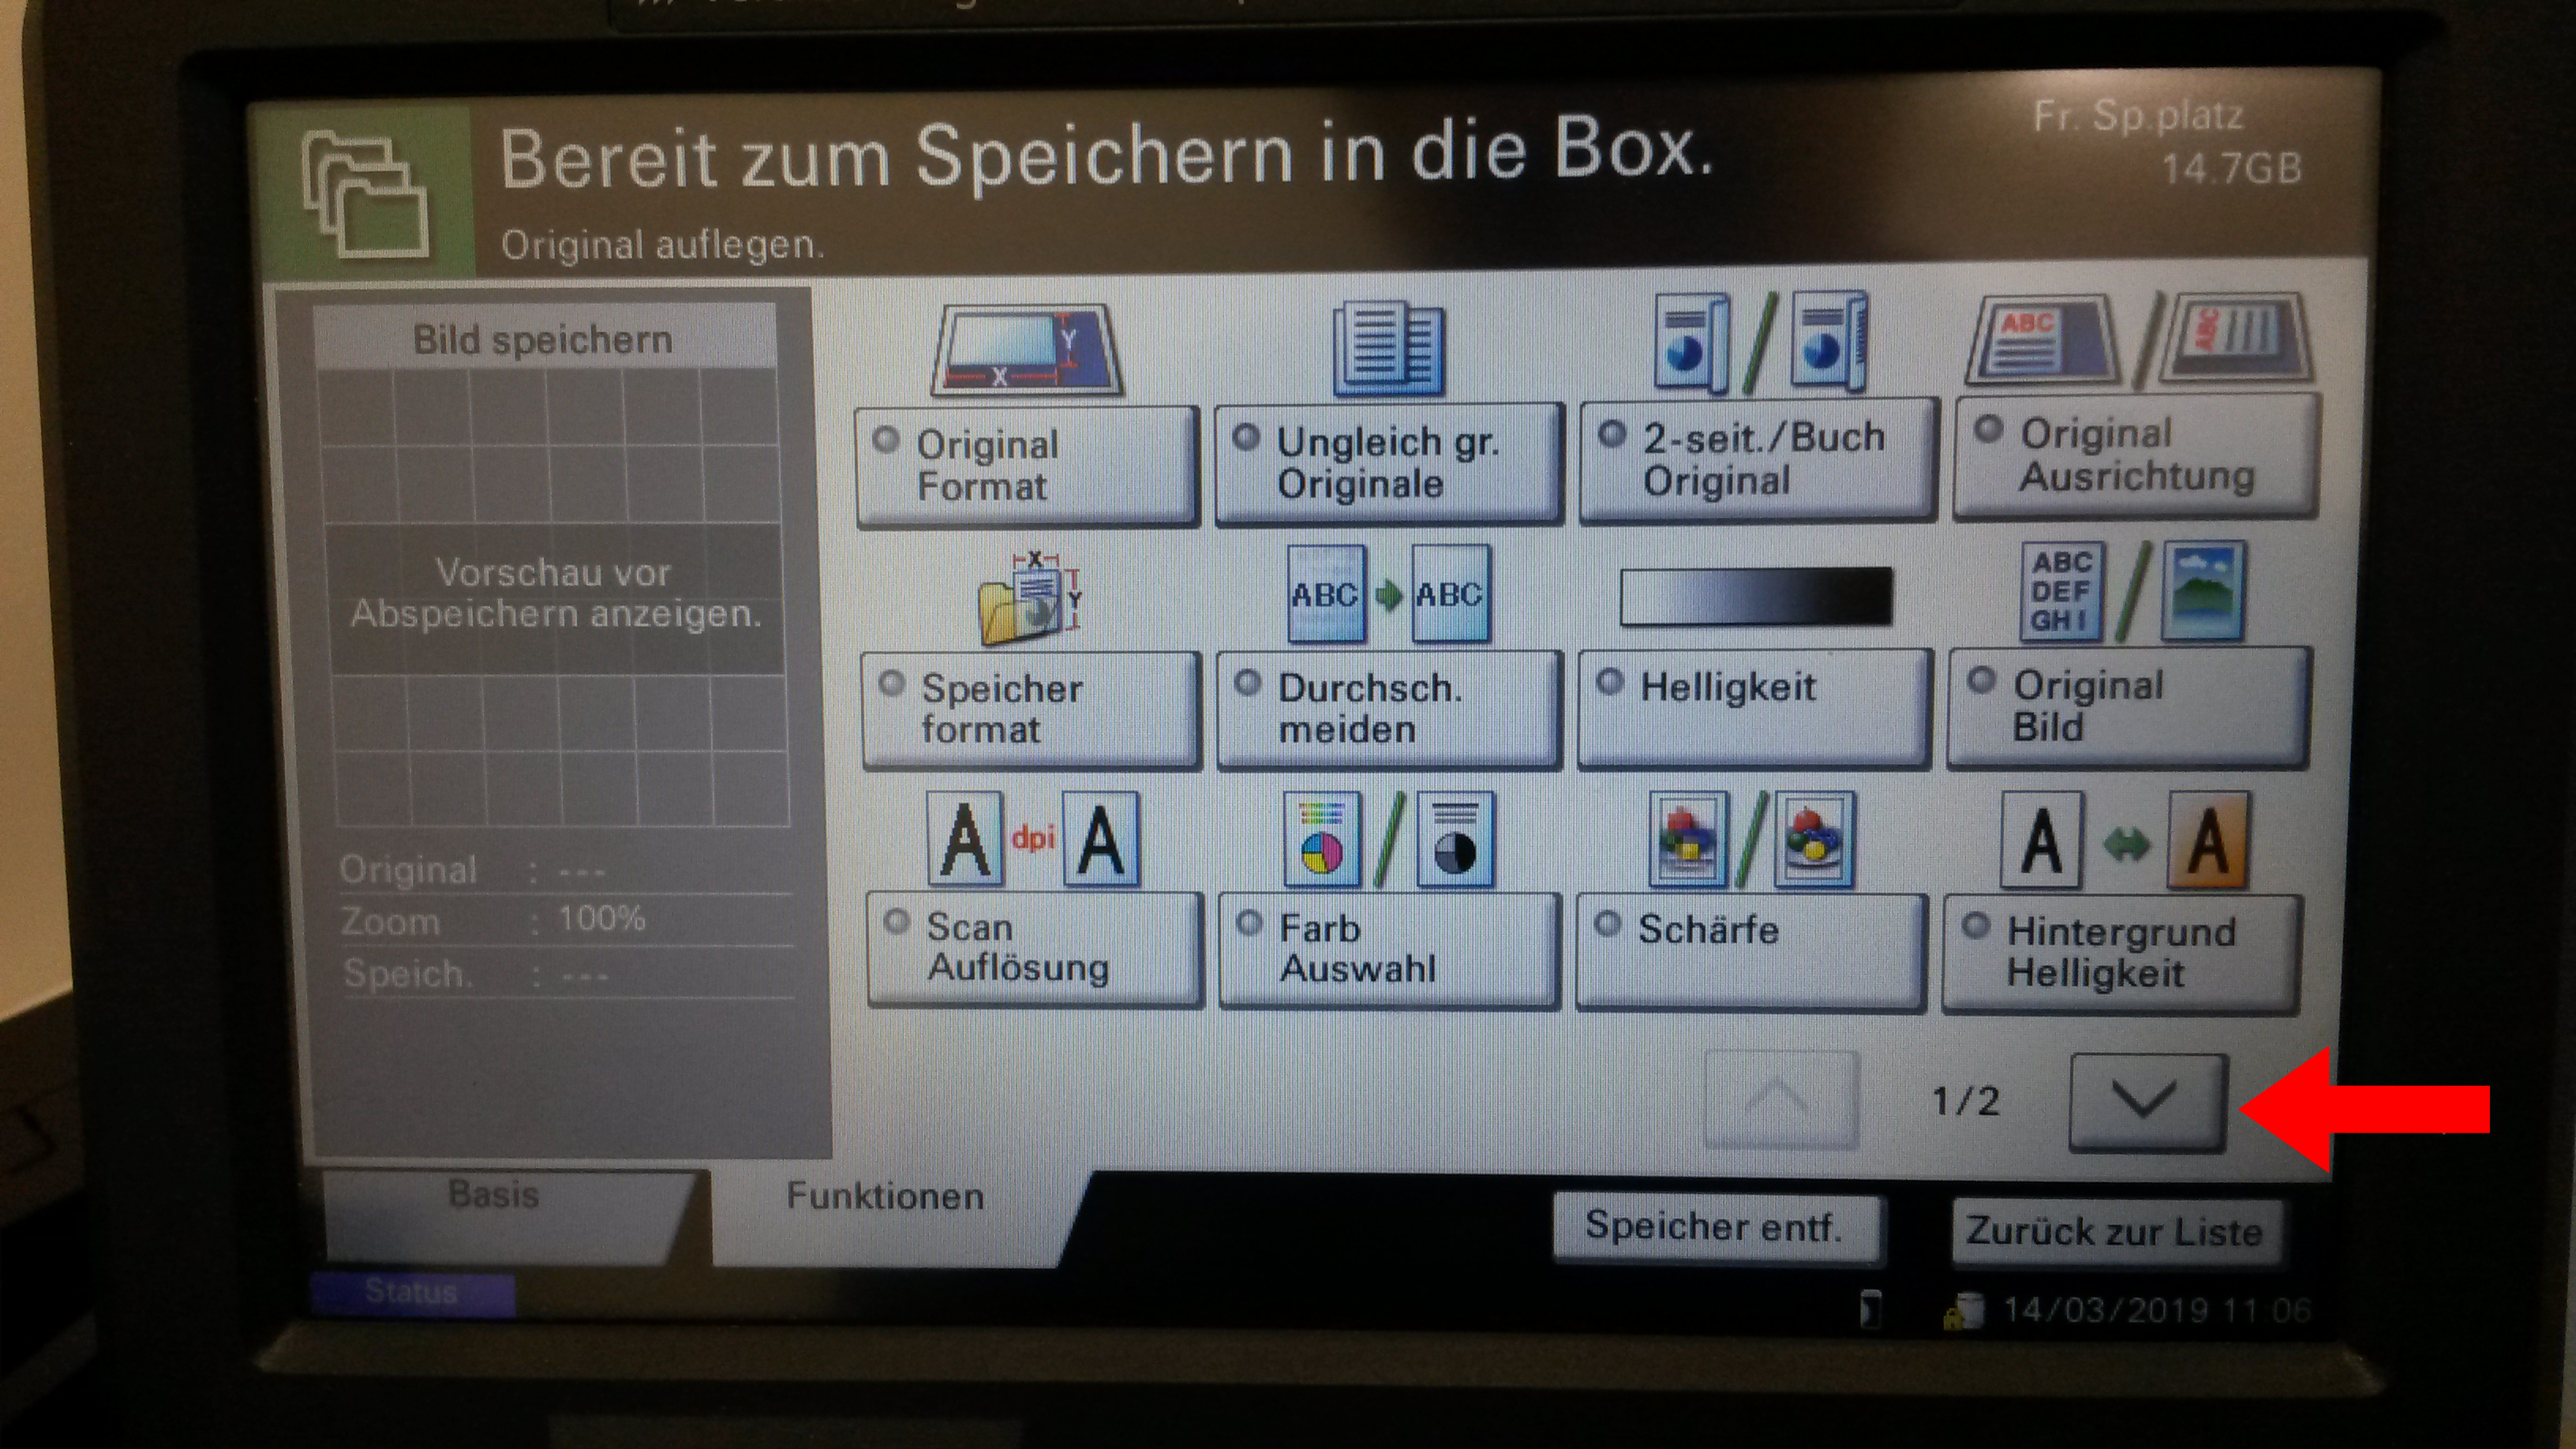 |
| In particular we like to point out the option “Dateiformat” (file format). | 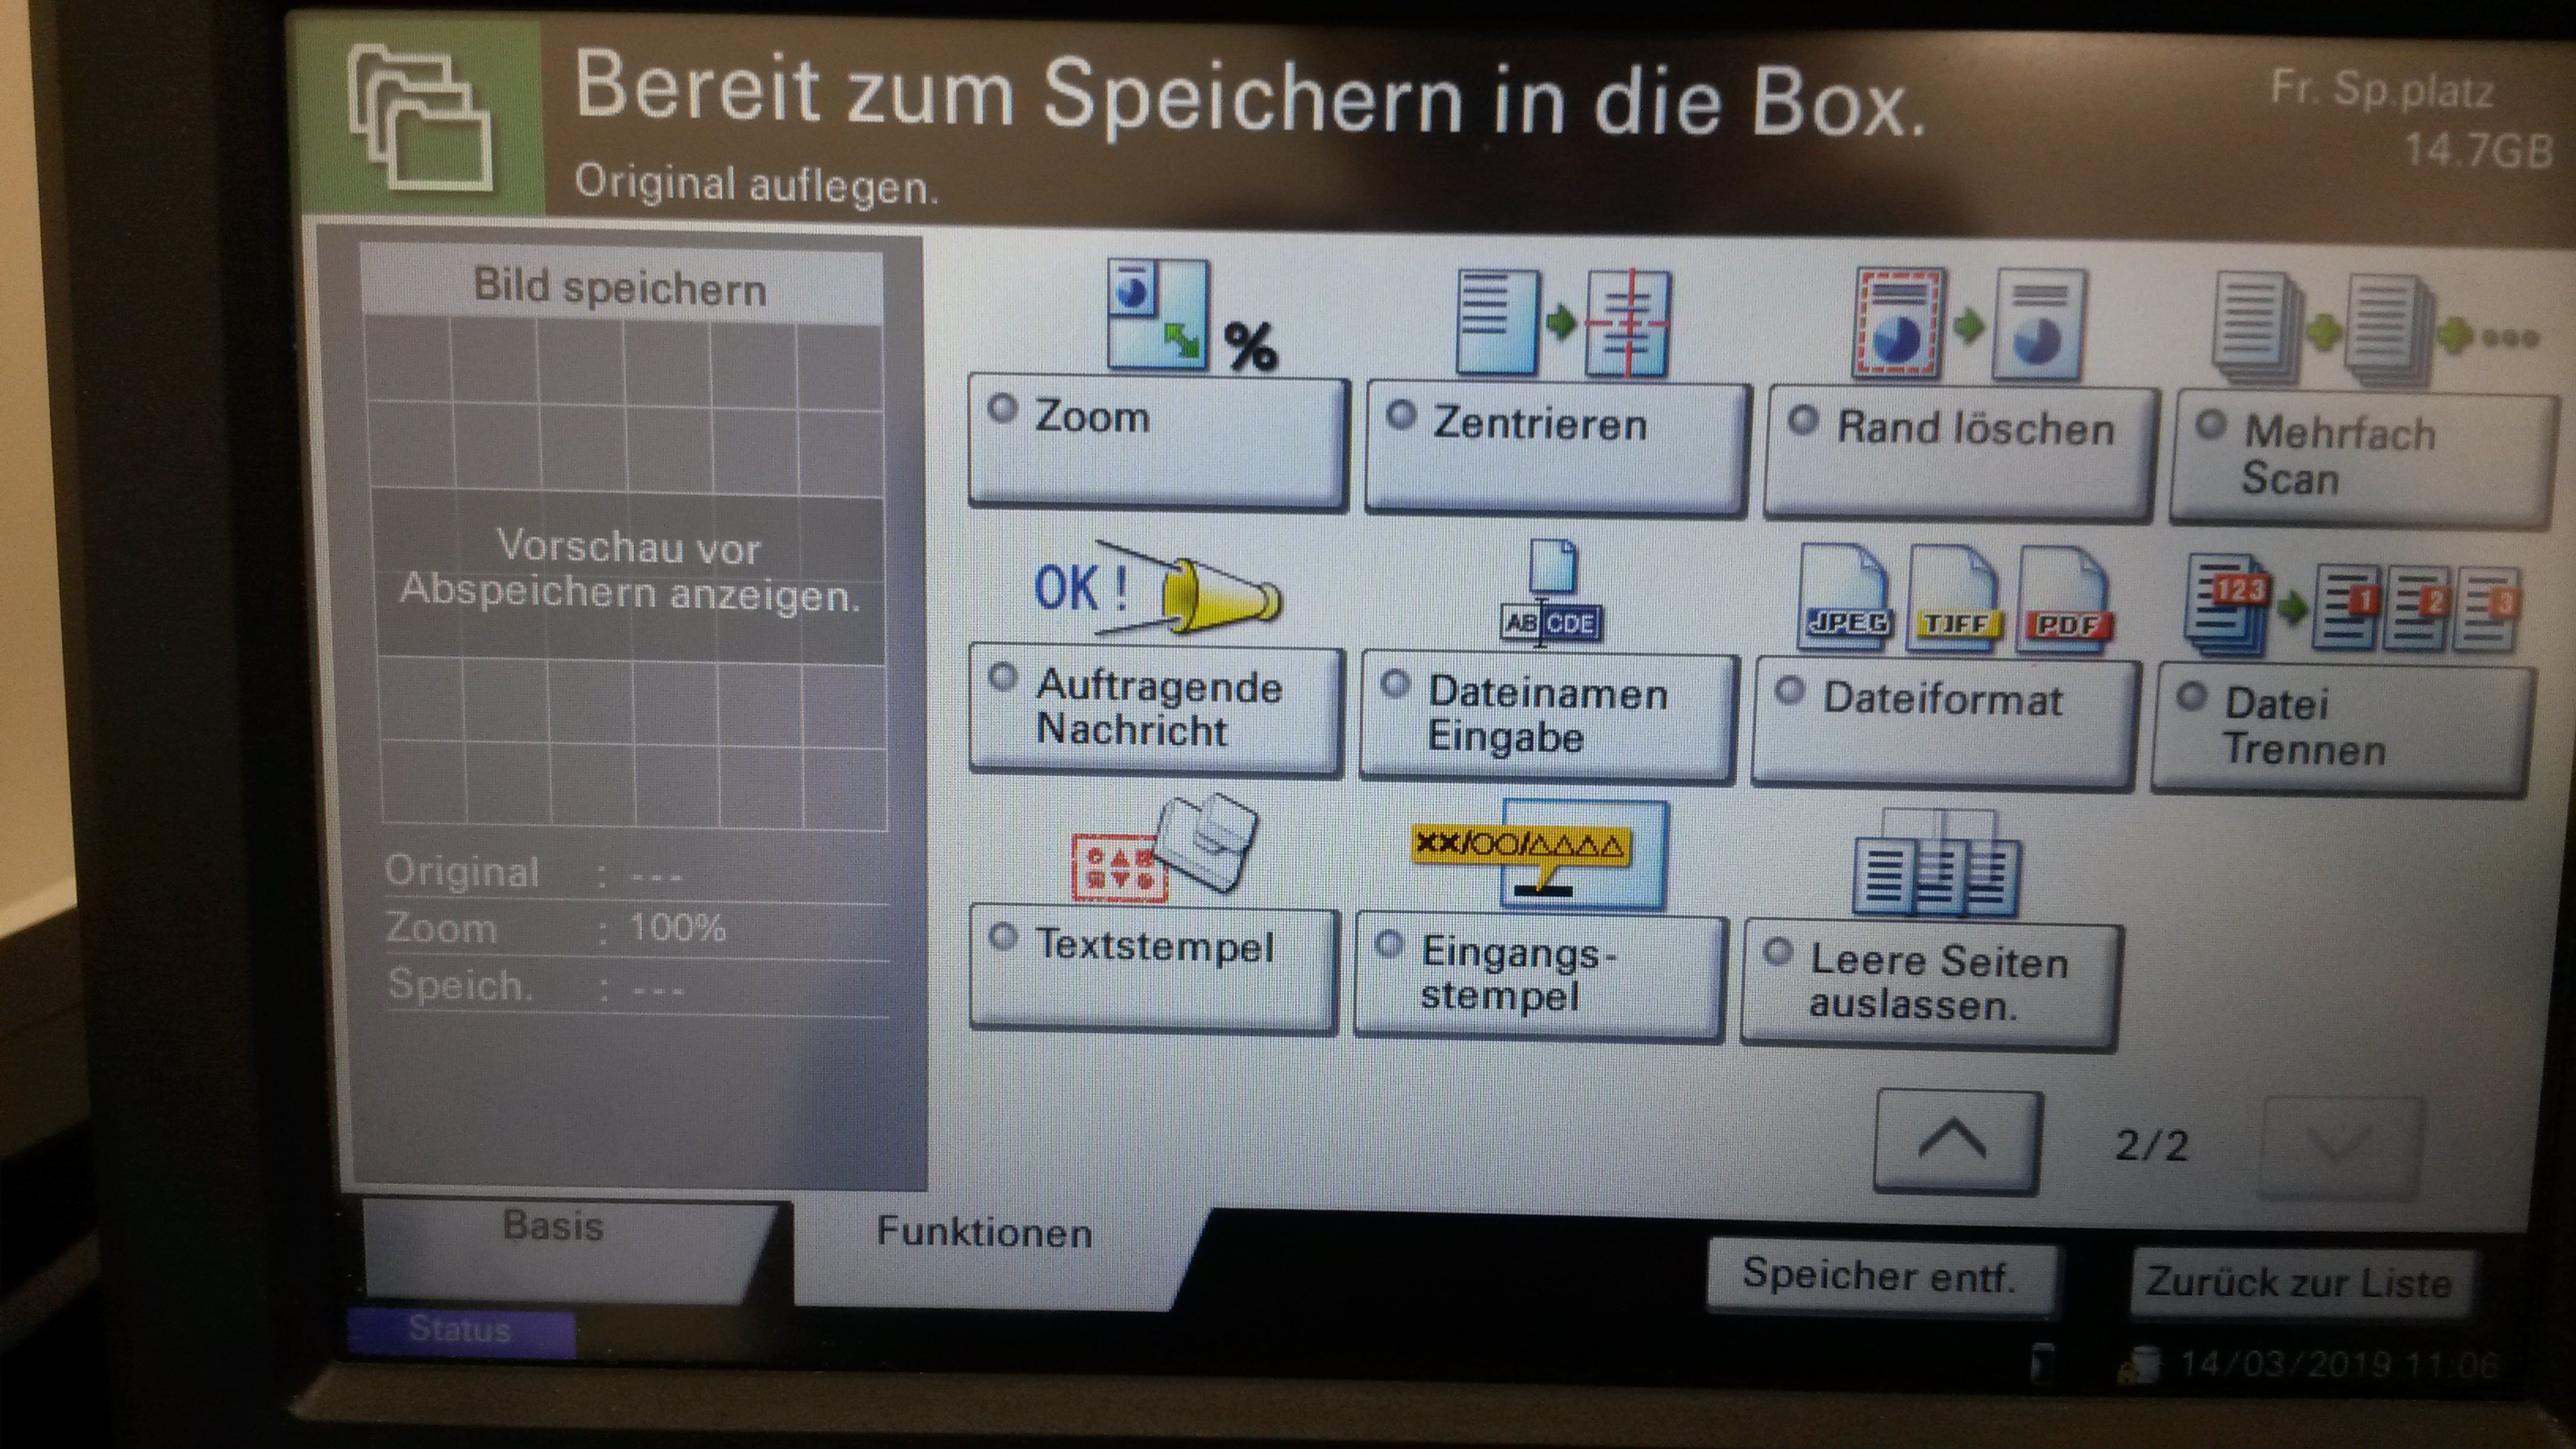 |
| Standart file format is PDF. PDF/A is recommended. Other options: – TIFF – XPS – Hoch komprimiertes PDF (Highly compressed) -> PDF/A compatible Enter with “↵ Ok” |
 |
| Finally, insert the document to be scanned and confirm the procedure with the start button on the panel. The file should then be on your device. |
 |